2019 Chain Link Fence Cost – Average Cost Per Foot For Chain Link Fence Materials

You may be asking yourself ‘How Much Does a Chain Link Fence Cost?’, so here are the most up-to-date 2019 chain link fence costs from Hoover Fence Co. We pride ourselves on offering the highest quality chain link fence materials the industry has to offer along with the experience to help you every step of the way.

We are proud to offer Complete Chain Link Fence Material Kits that include all the pieces and parts to build your chain link fence.

Galvanized Chain Link Fence Kits

Colored Chain Link Fence Kits

Note: The following pricing does not take into account any chain link swing or slide gates.

Light Residential Chain Link Fence Costs Per Foot (11.5 Gauge Chain Link Fabric, .065 Wall Tubing, All Fittings):

4′ High Chain Link Fence Price, Light Residential Grade: $4.39 per lineal foot

5′ High Chain Link Fence Price, Light Residential Grade: $5.08 per lineal foot

6′ High Chain Link Fence Price, Light Residential Grade: $5.79 per lineal foot

Add approximately 15% for all colored chain link fence, frame, and fittings.

Residential Chain Link Fence Costs Per Foot (11 Gauge Chain Link Fabric, .065 Wall Tubing, All Fittings):

4′ High Chain Link Fence Price, Residential Grade: $4.86 per lineal foot

5′ High Chain Link Fence Price, Residential Grade: $5.64 per lineal foot

6′ High Chain Link Fence Price, Residential Grade: $6.59 per lineal foot

Add approximately 15% for all colored chain link fence, frame, and fittings.

Commercial Chain Link Fence Costs Per Foot (9 Gauge Chain Link Fabric, HF20 Framework, All Fittings):

4′ High Chain Link Fence Price, Medium Commercial Grade: $5.87 per lineal foot

5′ High Chain Link Fence Price, Medium Commercial Grade: $6.88 per lineal foot

6′ High Chain Link Fence Price, Medium Commercial Grade: $8.11 per lineal foot

Add approximately 15% for all colored chain link fence, frame, and fittings.

Industrial Chain Link Fence Costs Per Foot (9 Gauge Chain Link Fabric, HF40 Framework, All Fittings):

4′ High Chain Link Fence Price, Heavy Industrial Grade: $7.52 per lineal foot

5′ High Chain Link Fence Price, Heavy Industrial Grade: $8.56 per lineal foot

6′ High Chain Link Fence Price, Heavy Industrial Grade: $9.92 per lineal foot

Add approximately 15% for all colored chain link fence, frame, and fittings.

Deluxe Industrial Chain Link Fence Costs Per Foot (9 Gauge Chain Link Fabric, HF40 Framework, All Fittings):

*6′ High Deluxe Industrial Chain Link Fence: $11.48 per Linear Foot

*9 gauge chain link fence , all 40 weight fence tube/ pipe for posts and top rail, bottom tension wire, top rail, braced and trussed, with barbwire. This is our most common choice for fencing for security, government jobs, self-storage facilities, and airports.

Add approximately 15% for all colored chain link fence, frame, and fittings.

Find out exactly what your chain link fence project will cost on above residential and commercial projects by using our Chain Link Fence Calculator here: https://www.hooverfence.com/calculators/chain-link-fence
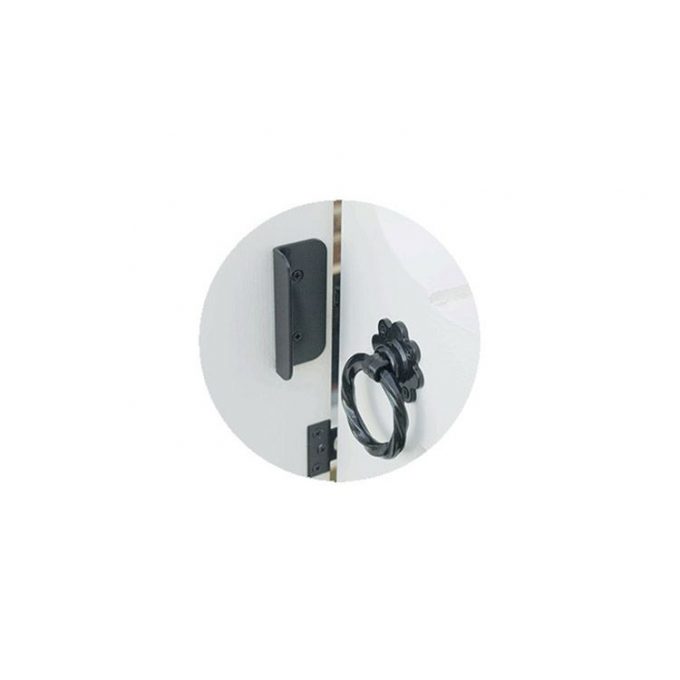
Installing Gate Stops on Swing Gates

Installing gate stops on your new or old gate is one of the least expensive and most valuable improvements a fence contractor or homeowner can make. Costing only few dollars, simple to install gate stops have a simple function – to prevent the gate from opening or closing too far. Over extending a gate may cause extreme damage to gate, adjacent fence, hinge(s), or gate closer. Installing an inexpensive gate stop is a cheap insurance policy against gate damage.

Think of most residential or commercial doors, and you’ll quickly visualize wood or metal trim installed on the inside of door jambs to prevent the door from closing past its proper point. Likewise, door stops are installed to prevent swing doors from crashing into adjacent walls, or opening too far and ripping doors off hinges. If these weren’t there, hinges would break, fasteners shear, and possibly doors split. Who doesn’t have a door knob imprint on drywall from a missing, or poorly adjusted door stop?

The practicalities of installing a gate stop can be challenging. We often don’t have adjacent walls to simply mount too, hinges do not come with built in stops, and the wind outside can be fierce – ripping gates off hinges each year. Fence contractors, gate installers, and do-it-yourself fence homeowners will need to consider mounting a gate stop on concrete surface (if one exists), or setting a post in the ground specifically to use as a gate stop.

For many in the fence industry, aluminum self-closing hinges, polymer self-closing hinges, stainless steel self-closing hinges, spring-activated gate closers, and hydraulic gate closers constitute a good deal of the budget to install a high quality self-closing gate. Many of the fence specialty gate hardware items require gate stops in the open and close position not only to function properly, but also to maintain warranty coverage from the manufacturers.

Solutions do exist for fencers though. For wood fence gates, ripping down a cedar or matching wood picket and tacking to the inside door jamb, at least on latch post, can be an extremely inexpensive solution over a gate being closed too far, ripping lag screws out of gate. Some wood gate latches may have an inherent gate stop built it, physically preventing gate from closing too far. Wood fence gate stops are available specifically for wood gates which install quickly with screws.

For Chain Link Gates, gate holdbacks and chain link fence gate stops can serve two useful purposes: to prevent gate from opening too far (this will usually force hinges to pivot and need adjusted) and hold the gate in the open position to pass thru without gate closing. Chain Link Hinges are sturdy, but usually rely on wrap-around bolt-on methods for installation.

For Vinyl Swing Gates, vinyl fence gate stops specifically designed for vinyl gates are available in materials matching popular polymer vinyl gate hinges; some even have built-in gate handles.

Ornamental Steel Swing Gates, and Ornamental Aluminum Swing Gates, gate stops are plentiful since flat surfaces are usually involved. Simple face mount, jamb mount, and separate post mount gate stops can prevent damage to gates and hardware when installed properly.

Simply put, installing inexpensive gate stops for the open and closed position on swing gates is a ‘must-do.’

Emergency Response Team Access Control

Make Access Control by Emergency Response Teams Part of Your Emergency Response Plan

An Emergency Response Plan is a plan created to address an emergency caused by a natural disaster such as a hurricane, storm, or fire. More frequently, emergency response plans also incorporate live shooters in schools and the workplace, terrorism, and home invasions. Evacuation routes and safe zones should be identified clearly and what-if scenarios considered. Emergency response plans address where to go for safety, supplies that you may need to survive and be comfortable, and who to contact for help. Emergency response plans should be developed early at home, school, and work, shared with family and peers, and reviewed/ updated frequently.

As a fence, gate, and access control distributors and contractors, we’ve helped design, build, ship, and install thousands of residential, commercial, and industrial perimeter fences, automated driveway gate packages, and secured gates for over 40 years. We’ve learned a thing, or two in our experiences working with professional architects, engineers, military and government personnel, school employees, manufacturers, and average homeowners.

While our emphasis has usually been placed on security:
Homeowners want to keep people out, but dogs and animals in.
Schools want to allow students and parents freedom, but maintain safety.
Department of Corrections wants to keep keep prisoners in, but allow visitors and deliveries.
Business owners want to protect their employees and goods, but be open to customers.
U.S. Embassies and airports want security, but also want to be welcoming.

We also need to address a third party: Emergency Response Teams
Make sure Access is considered when you need it most by Emergency Response Teams such as fire departments, EMTs, ambulances, and law enforcement. Most are trained and proficient in doing whatever necessary to access those in need, however seconds count in the event of an emergency.

Emergency Response Plans should incorporate advice from several parties – Don’t just take our word for it! Contact your local authorities who have likely encountered such emergencies. They have also likely encountered gated entrances, mechanical locks on doors, and maglocks on businesses and pedestrian gates. Local law enforcement, fire departments (municipal or multiple townships), and local zoning and building departments. Emergency Response Teams are trained with tools such as Jaws of Life and other specialty tools, however every second can count in the event of an emergency.

Some of our Access Control Accessories are specifically designed for door and gate access by Emergency Response Teams. Consult local agencies for preference. Some ordinances even exist requiring such access control devices for doors and gates for safety.

Knox Box Access Control Lock Box – ‘Leave them a key’ type devices are metal housed lock boxes that house a physical key, or activate an electric switch immediately open opening. Some municipalities, townships, and local fire departments prefer a externally mounted, visible, easily accessible lock boxes to access gates and doors in the event of an emergency. Emergency departments carry a Knox lock key specific to the area they serve for universal access. Lock boxes can come equipped with an electric switch which triggers a gate to open, or lock to unlock immediately open opening. Some lock boxes simple provide a secure space to store an access control device such as a simple manual key override to your system.

Radio Controlled Emergency Response Access Controller – Some municipalities and jurisdictions prefer access to automated gates and locks using their radio controlled equipment. Emergency teams can quickly gain access to gated communities, etc.. with radio equipment installed in vehicles. Local fire departments may advise frequency and programming instructions.

Siren or Strobe Activated Emergency Response Access Controllers – Open gated communities, residences, and businesses using sensors which detect sirens or strobe lights found on emergency response vehicles immediately upon arrival. Externally mounted devices are finely tuned to activate gate operators to open in the event of an emergency.

Other Access Control Devices – Consider also radio transmitters, unique codes to keypads, manual keys, cards for card readers, and remote access using telephone intercoms as possible ideas for allowing access to secured gates and doors.

Mechanical Free Egress Devices – Secured door or gate, great! How do people leave in case of an emergency? Panic Bar Commercial Door Hardware and Exit Control Locks (with and without alarms) have long been installed, even required by some building codes for public buildings. Panic bar exit devices are now available and required by some building codes for pedestrian gates. We have specially designed Panic Bar Exit Gate Kits for chain link gates, ornamental steel and aluminum swing gates, and even a Prehung Chain Link Access Gate and PreFabricated Complete Panic Bar Kit available with controlled access/ free egress available. Even a simple Panic Latch for your vinyl gate, Locinox pushbar,  or Locinox Free Exit Lock can save time in the case of an emergency.

It’s never too late, until the disaster has occurred. Consult local authorities, security professionals, and alarm companies for advice before making your own decision on what’s right for your application. Lock your doors, secure your properties, but don’t forget to plan an escape route and entrance for emergency response teams. Be safe and protect those around you!

How Long Will Cedar Split Rail Wood Fence Last?

“Hello, I am interested in installing a cedar split rail fence around my home, but am concerned about setting the posts in our very heavy clay. I am a contractor and would be concerned about the longevity of the posts with the probability of water collecting and standing in the holes. Is there a way to protect the post below grade? If post spacing is 10′, will the fence rail have any sag?” – Customer Inquiry

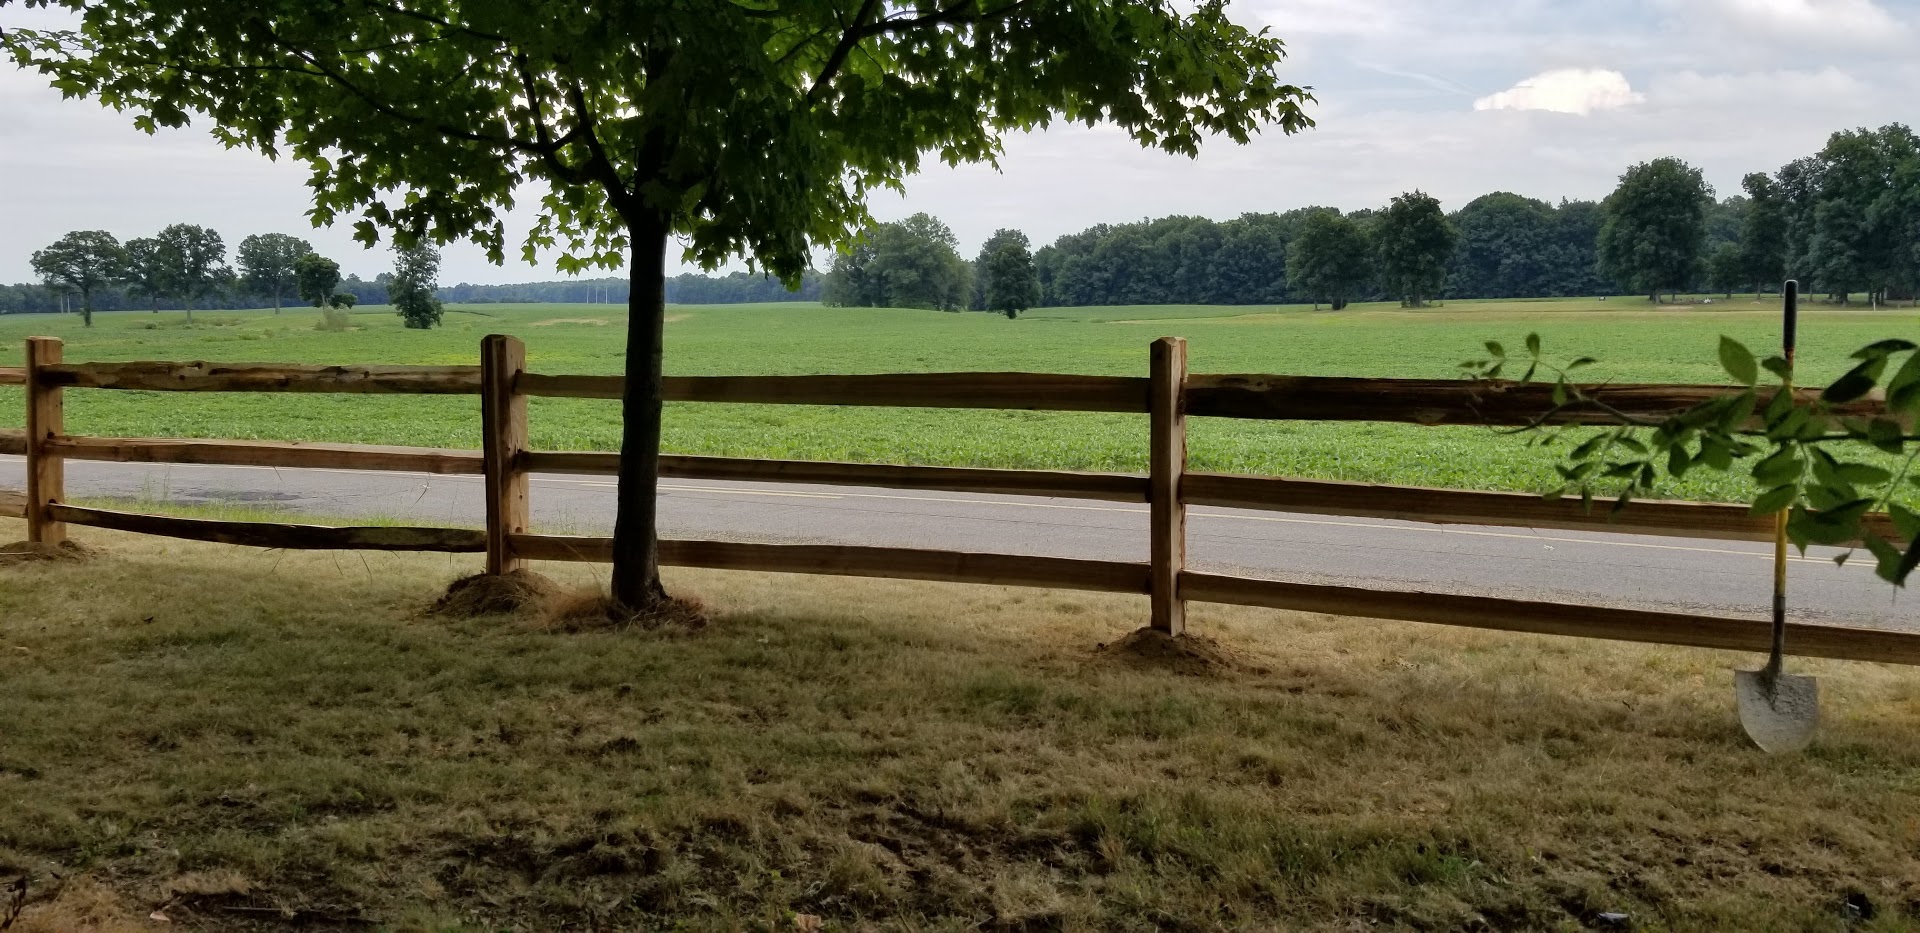
Western Red Cedar Split Rail Fence – New Installation of 3-Rail Configuration – Stands Approximately 4′ High

New Installation of Western Red Cedar 3-Rail Split Rail Fence

Related Products:
Western Red Cedar Split Rail Fence I West Virginia Lap Rail Fence I Treated Split Rail Fence I Split Rail Fence Cost & Material Calculator

Thank you for interest in our site and fence products. The simple answer to this difficult questions is 15-30 years for a cedar fence and around half that for spruce and pine – treated, or not.

The longevity of our wood fence products can vary. Soil composition, climate, moisture, and proper maintenance all play a part in how long a wood fence product may last. Deduct 10-15% for harsh environments; add 10-15% for proper maintenance and installation procedures.

How Do You Protect Fence Posts Below Grade?
Years ago, tar and creosote were used to coat fence posts below grade, however there are environmental factors to consider. Consult a paint and stain dealer who may be able to recommend a suitable sealant to help prevent water damage. Back filling fence post holes with gravel, instead of clay, or dirt is a tried a true method to help prevent water from contacting posts; water will drain away. Water-logged posts will degrade quickly. Proper sealant, or stain will help wood fence components above ground.

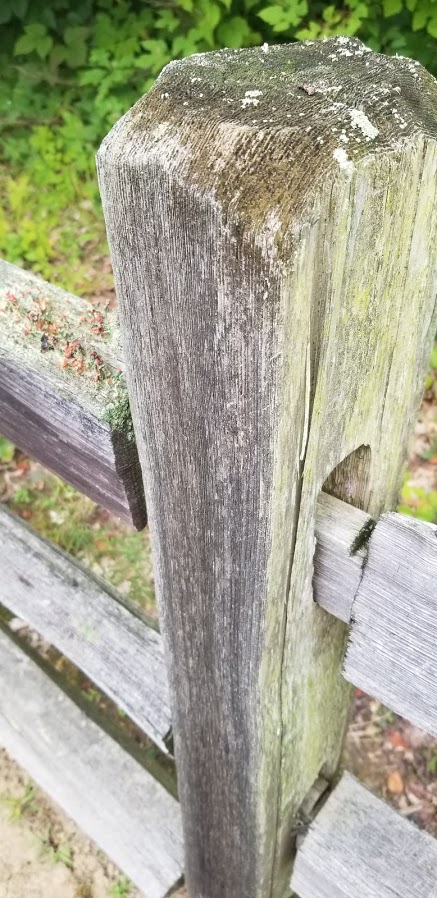
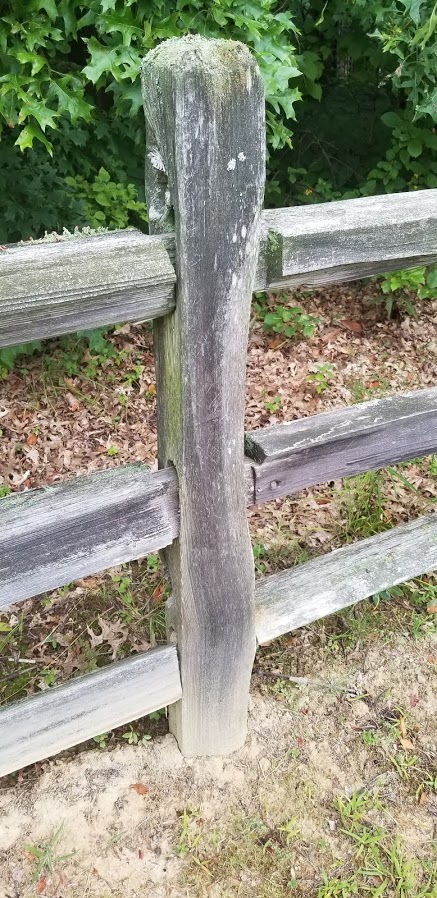
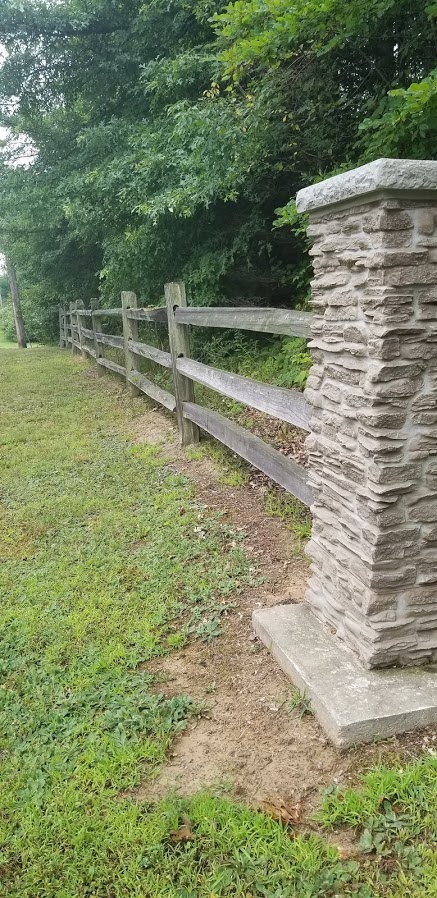
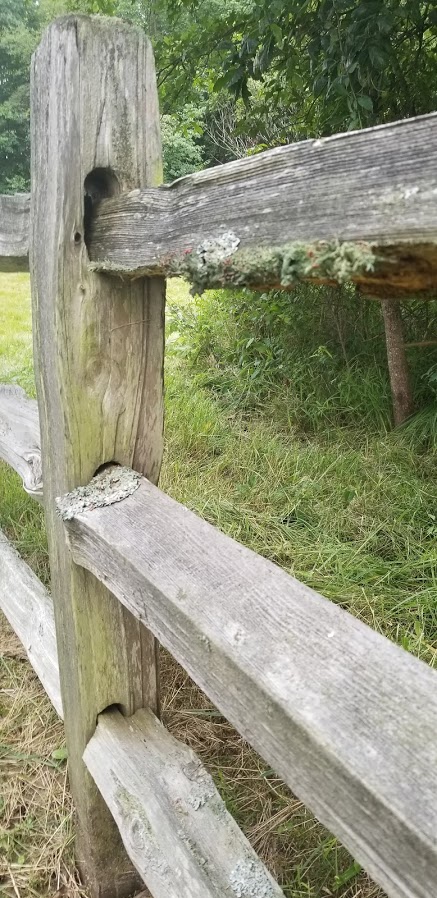
Split Rail Fence Post Aged 15 Years

How Long Does a Wood Fence Post Last?

Aged Wood Fence Posts Can Develop Moss-Like Growth

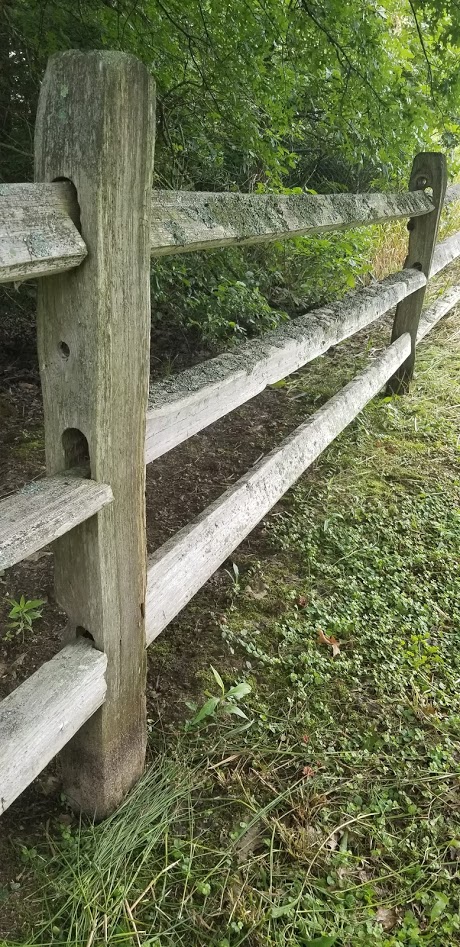
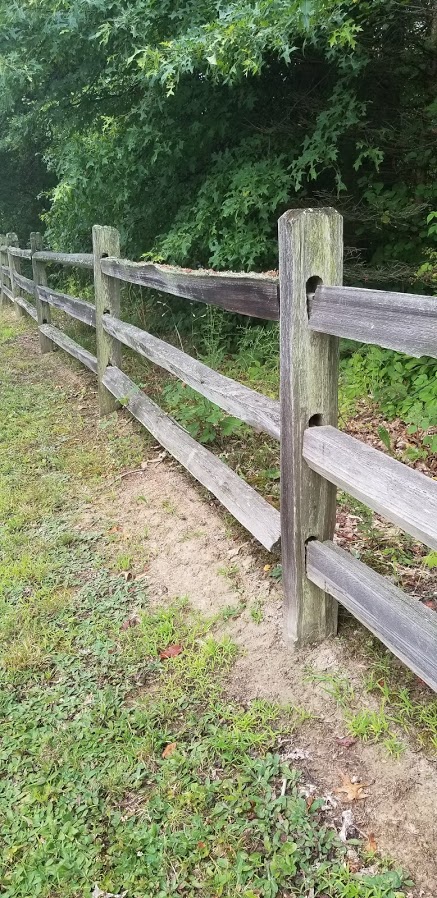
This Western Red Cedar Split Rail Fence with Jumbo Rails is 15 years old. Post are strong, rails still connected to posts well, and minimal rot. Fence has never been treated with a preservative. Posts set in Ohio clay and in damp environment.

How Do You Prevent Fence Rail Sag?
You can’t, but you can install heavier rails to begin with. Our western red split rail products are available in industry standard sizes of jumbo (14-16″ girth), standard (12-14″ girth), and pony (10-12″ girth). Our posts are also jumbo. Line posts and end posts measure approximately 18″, and corners are 20″. Using the heavier grade is the best way to prevent rail sag. We also prefer to only offer our pony size split rail in 8′ lengths to help prevent sag.

Hoover Fence Western Red Cedar Jumbo Rails Show Minimal Sag After 15 Years!

Split Rail Fence Rails With Minimal Sag – Hoover Fence Co.

In summary, there are many factors which contribute to the lifespan of a wood split rail fence. For best results, choose larger components when available, backfill with gravel instead of dirt, and use proper sealant, or stain every couple years to prolong the life of your fence. Understand too, labor to install is a constant in this case – meaning it takes nearly the same amount of time to install lesser materials as the best of materials. We’ve found from experience that it is always best to install the best materials available.

Happy Fencing!


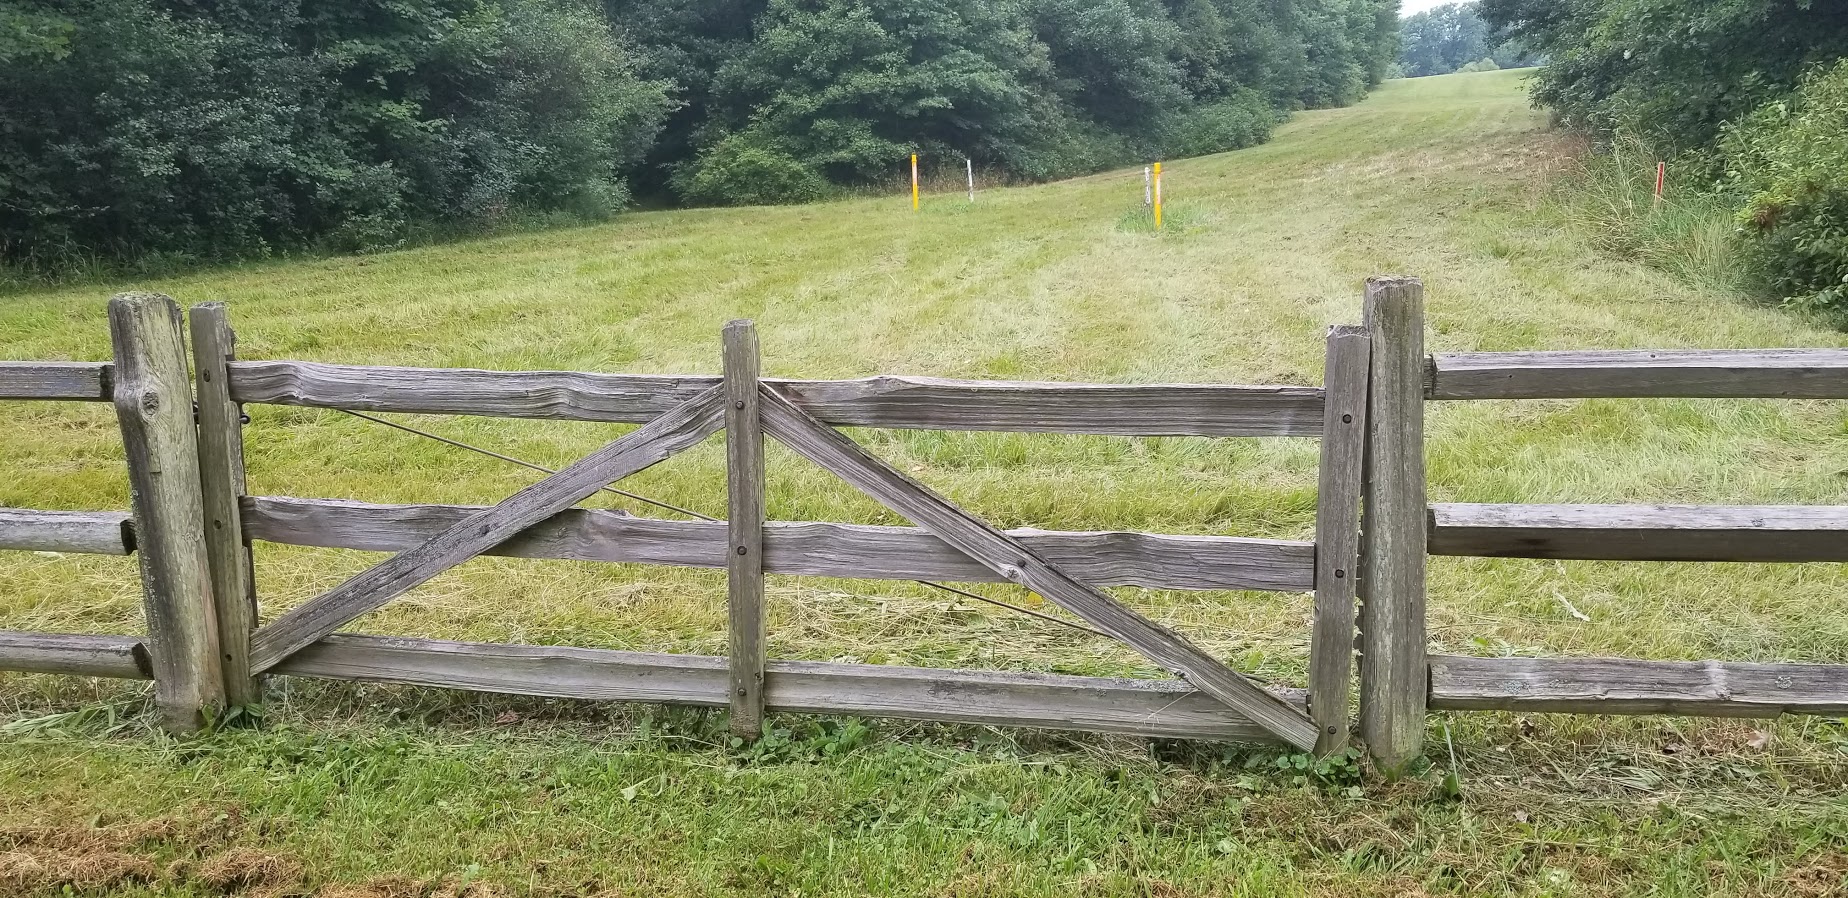
Steel-Framed Western Red Cedar Split Rail Gate aged to perfection after 15 years of use and abuse. This one needs an adjustment, or two, but is still in fine shape. Larger steel posts are set behind split rail fence posts to conceal.


How to Stretch Chain Link Fence with a Bias Cut

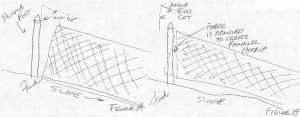
When woven, chain link fence fabric is ‘square’ meaning sides are perpendicular to each other and a roll of chain link is indeed a rectangle when unrolled and laid out. A problem arises when setting chain link fence posts, framing top rail, and stretching chain link fence mesh as landscapes and terrains are rarely flat, level, or even straight. Experienced fence contractors will have the wisdom to raise and lower posts to accommodate grade changes, however sharp slopes of terrain will leave the top, or bottom of the fence loose. To accommodate sharp slopes, the chain link fence fence fabric can be bias cut to shorten either the top, or bottom of the fabric in width, allowing it to be stretched tight.

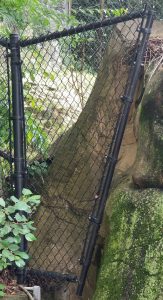
Essentially, one will need to layout chain link fence fabric across top rail of fence. This is the constant for a good looking chain link fence installation. Side ends and even the bottom can always be cut to fit, however the top rail is one of the most noticeable parts which will show a poor fit chain link fence. After lining up the chain link fence fabric to top rail, tie it off to hold in place. Estimate how many links, or chain link pickets that may need cut. Removing 2 or three pickets in even increments, ‘stair-steps’ down the length of the fence is frequent. Cutting out more chain link pickets than this is a significant bias cut. Once cut, you may find bending the remaining fence link slightly to help hold in place helpful. Next, slide 3/16″ x 5/8″ (or 3/4″) tension bar in at angle. Take care to force tension bar at appropriate angle and catch each transition point in the fence. You may find tension bar to be short since you now need a longer length at an angle versus run straight. Use a longer one, or cut two to overlap if necessary and you have an extra. Tension bars for chain link fence can be overlapped to make longer. Last, connect chain link fabric and tension bar to fence terminal post with 5/16″ x 1-1/4″ galvanized carriage bolts and nuts and appropriate-sized chain link fence post fittings. Use aluminum or galvanized steel chain link tie wires to secure chain link fence to frame.

Some stretches of chain link fence fabric will have a bias cut on one end only. More rare, but possible, are stretches of chain link fence that require a bias cut on both ends; these are often shorter stretches where the tightness, or looseness won’t be spread out over a longer stretch of fence. Repeat steps on other end if necessary until all slack is removed. Check out our complete How to Install Chain Link Fence Manual here.

2018 Fence Costs Per Linear Foot – Average Cost to Build a Chain Link Fence

2018 Q2 Fence Costs Per Linear Foot – Average Cost to Build a Chain Link Fence

We’ve found fast, friendly, transparent, and accurate pricing is the most effective way to offer our fence products.

Residential Chain Link Fence Costs Per Foot:

4’ High Chain Link Fence Price, Light Residential Grade: $3.95 per lineal foot

5’ High Chain Link Fence Price, Light Residential Grade: $4.55 per lineal foot

6’ High Chain Link Fence Price, Light Residential Grade: $5.19 per lineal foot

Add approximately 15% for all colored chain link fence, frame, and fittings.

Commercial Chain Link Fence Costs Per Foot:

4’ High Chain Link Fence Price, Medium Commercial Grade: $4.87 per lineal foot

5’ High Chain Link Fence Price, Medium Commercial Grade: $5.65 per lineal foot

6’ High Chain Link Fence Price, Medium Commercial Grade: $6.63 per lineal foot

Add approximately 15% for all colored chain link fence, frame, and fittings.

Industrial Chain Link Fence Costs Per Foot:

4’ High Chain Link Fence Price, Heavy Industrial Grade: $6.08 per lineal foot

5’ High Chain Link Fence Price, Heavy Industrial Grade: $7.06 per lineal foot

6’ High Chain Link Fence Price, Heavy Industrial Grade: $8.29 per lineal foot

*6’ High Deluxe Industrial Chain Link Fence: $10.50 per Linear Foot

*9 gauge chain link fence , all 40 weight fence tube/ pipe for posts and top rail, bottom tension wire, top rail, braced and trussed, with barbwire. This is our most common choice for fencing for security, government jobs, self-storage facilities, and airports.

Add approximately 15% for all colored chain link fence, frame, and fittings.

Find out exactly what your chain link fence project will cost on above residential and commercial projects by using our Chain Link Fence Calculator here: https://www.hooverfence.com/calculators/chain-link-fence
Note, several additional factors contribute to chain link fence estimating including, but not limited to options as follows:

Galvanized Chain Link Fence versus Color Coated (add approx. 15% for colored)
Addition of Bottom Tension Wire
Top Rail for Fence or Top Wire
Quantity, Size, and Type of Chain Link Gates
Weight (wall thickness), Diameter, and Length of Fence Posts
Gauge and Mesh Size
Galvanized Coating Chain Link Mesh (GAW – Galvanized After Weave)
Galvanized Coating Chain Link Mesh(GBW – Galvanized Before Weave)
Extruded Vinyl Coated Chain Link Fence or Extruded and Bonded
Aluminum or Aluminized Chain Link Fabric and Fittings
Welded Gates or Screw-On or Bolt-On Gate Corners

Gate Opening Size Versus Gate Finish Size – What’s the Difference?

The difference is the width of the gate and the distance between posts. Hoover Fence builds all chain link gates for the opening size they are designed to fit, using our typical hardware. We can build gates to spec so if you need a gate with a particular finish size, please specify upon ordering.

Gate Opening Size: The ‘opening’ size is the distance between your hinge post and latch post, measuring from inside to inside of hinge and latch post.

Gate Finish Size: The ‘finish’ size is the actual width of the gate, measuring from outside to outside of gate uprights.

Gate Finish Size Calculations = Gate Opening size minus hardware space allowance.
Hoover Fence build gates for opening sizes, unless you specify finish size. Hardware choices need specified.

Residential Chain Link Gates

Single Gates: Designed for pedestrian traffic, usually up to 6′ wide in residential materials; larger gates are made of heavier materials. Typically, standard chain link male and female hinge assemblies installed use 1-5/8″-1-7/8″ space. A standard fork latch assembly installed will use approximately 2″ and allow for space to pivot. Overall, our residential chain link walk/ single gates are 3-5/8-4″ less than the space they are made to fit. A 4′ wide gate will actually measure 44″ and change.

Double Driveway Gates: Designed for larger items such as vehicles, and lawn maintenance equipment are generally available in any side up to 12′ (2 -6′ gates). Larger gates are available, but would be made of heavier grade materials and be called commercial or industrial. Same as above, but you need to figure the hinge allowance x two since there are two gates which need hinges (1-7/8″ + 1-7/8″ = 3-3/4″). Our residential chain link drop rods, these usually need around 2-1/2 to 3″ to open, pivot, and close properly. Overall, a double residential gate will be approximately 6-7″ less than opening built to fit. A 12′ double gate will have two gate leaves measuring 69″ and change.

How to Retrofit a Chain Link Gate – Installing a Chain Link Gate in a Fence Line

We have many customers who wish to install a chain link gate where there currently is an existing in-ground, stationery chain link fence. Here’s how:

Decide on Width: Many wish to simply install gate in-between two existing line (intermediate) posts. You can and we’ll tell you how, but first – here are a few considerations. There can be a few potential problems:

Line posts insufficient in ‘weight’ (strength – wall thickness), diameter (O.D. = outside diameter) and height. The ‘weight’ of a post, as we often call it, refers to wall thickness. If you have a very thin wall post, it will bend and not support the weight of a gate. The diameter of a post also needs to be sized appropriately for the additional stress a gate imposes. Small, thin-walled posts are insufficient for hanging gates on them. Lastly, line (intermediate) posts are usually set 3″ +/- lower than terminal posts (end, corner, and gate posts). The post may not be tall enough to tie in top rail of chain link fence (we do have post extensions which can fix this). These posts you’ve ‘sized’ up for hanging and latching a chain link gate to, must also be cemented in the ground. Some chain link fences have all, or just terminal posts concreted in place. Some fence installers drive all of them and simply cement ‘pull’ posts (end, corner, and gate posts). All chain link posts supporting gates should be cemented in place. This is perhaps more important than the type of post used. Don’t forget posts must also be perfectly plumb because gates are square. If you do not have the right posts in place to use as a terminal hook-up post and gate post, you can still install a new chain link gate in-line, you will simply need to set new posts.

Once you’ve determined line posts are sufficient to use as gate posts or set new posts, it’s time to go to work.

Remove tie wires with fence pliers for area of chain link fence affected, go a couple feet wider than the width of gate you want to install. At this point, you need to ‘cut out’ the section of chain link fence and top rail where the gate will be installed. Yes, you can do this on both ends with bolt cutters, or you can use a come-a-long, two chain link stretch bars, and two tension bars. Slide a tension bar in both ends close to where you want the stationery chain link fence to stop (gate starts) and slip on the two stretch bars. Connect with come-a-long and give it a few cranks until you can unbend top and bottom chain link weave (twist gently to find top and bottom) and unravel. You ‘cut’ chain link by unweaving a link. You can connect it back together the same way, hence the reason we unbend the tops and bottoms, and not cut. Top rail always needs cut. Use a hacksaw, pipe cutter and pipe wrench, portable sawzall, or bandsaw (in opposite order by preference). You now have a ‘hole’ to install your new gate.

Reuse existing fence post, or set new. Post must sit up 1-3″ above existing top rail to allow for a brace band, rail end cup, and carriage bolt. You will also need 1/2″ +/- to tap a post cap on top. Reattach top rail and install post cap. Restretch chain link fence fabric to end post with a Pul-Jak, or Short Stretch Tool.

Install chain link female hinges. These clamp on and secure with carriage nuts and bolts. They should rest 2-4″ from top and bottom of gate frame. Tighten bottom, but leave top loose. Hold gate up to hinge post to visualize placement of male hinges. Tap male hinges on post, install carriage bolts, and tighten male hinges firmly. Bottom hinge pin points up, top hinge pin points down so gate can not be removed once firmly mounted and nuts tightened. Lift chain link gate, set down on bottom male hinge, lift female hinge to slide on to top male hinge, and tighten.

Install latch(es) and test gate swing and latching function. If gate is too tight, you can ‘cock’ hinges, by tapping on both top and bottom hinge to tap pivot point ‘out of center’. If gate is too small, you can consider changing hardware. Chain link J-Bolt hinges are a common choice. We also have an assortment of hinges and latches made by D&D Technologies, DAC Industries, and Nationwide Industries that are adjustable.

Hello Fencers!

Welcome to the Hoover Fence Company Blog!

We are particularly excited to reveal this Blog as it coincides with the redesign of our website www.HooverFence.com! Over the 20+ years that we have been doing business online, e-commerce has evolved and it was time for us to evolve with it. All of our great products and helpful information is still there, but in a layout that is more accessible and easier to use. We hope that we will continue to be Your Online Fence Resource in the years to come.

With over 40 years in the Fencing Industry, we feel we have some valuable experience to share with you. Over time we plan to offer reviews on exciting new products, helpful How-To Information, and general updates on both our company and the Fencing Industry as a whole.

Stay Tuned!